Showing posts with label tips. Show all posts

Wednesday, February 20, 2019

DIY handheld water bottle

I like to run all races 10 miles or longer with a handheld water bottle.   I struggle with drinking water out of cups while running, and I also like to drink continuously with small regular sips, rather than take a massive chug every two miles.  Thus, for me, a handheld is the way to go.  Sometimes I'll carry the bottle all the way to the finish line; other times I'll toss it with a few miles to go.

You can buy a handheld water bottle at any running store or race expo, but they do get (relatively) pricey - $25 or up.  While that's not going to break the bank, it is a fair amount of money to pay for something I may toss at some point during the race (or alternately, forget somewhere).  Additionally, I've found that the fabric handles on most retailer handhelds are too large for my hands, and also don't last terribly long before fraying or stretching.

So...a few years ago, I started making my own handhelds.  (To be clear, I make the handle, not the bottle itself - I'm not that crafty.)  Here's how I do it.

1)
You need three things: a roll of 2 inch wide duct tape, a pair of scissors, and a water bottle.  For the last, I like to buy packs of 10 oz refill bottles for hydration belts - a pack of two bottles costs $7, so $3.50 a bottle - not bad.  If you want to go even cheaper (or alternately, be more environmentally friendly) you could just recycle any plastic water bottle.  I prefer the hydration belt bottles because I like the way they fit my hand.

2)
Start by measuring out a length of duct tape about 4 times the height of the water bottle.  Double this back on itself, sticky side to sticky side.  This will be the handle of your water bottle.  (Of course, you can customize the length of this to fit the size of your own hand.)

3)
Fold back the end of your doubled-back duct tape (try saying that three times fast) and cut a slit.  By doing this, you are creating a slot in your handle for the neck of your water bottle.  Make sure not to cut so far that the slit extends past the edge of the doubled-back tape - you want a hole at the top of your handle, not a "Y" shape.
4)
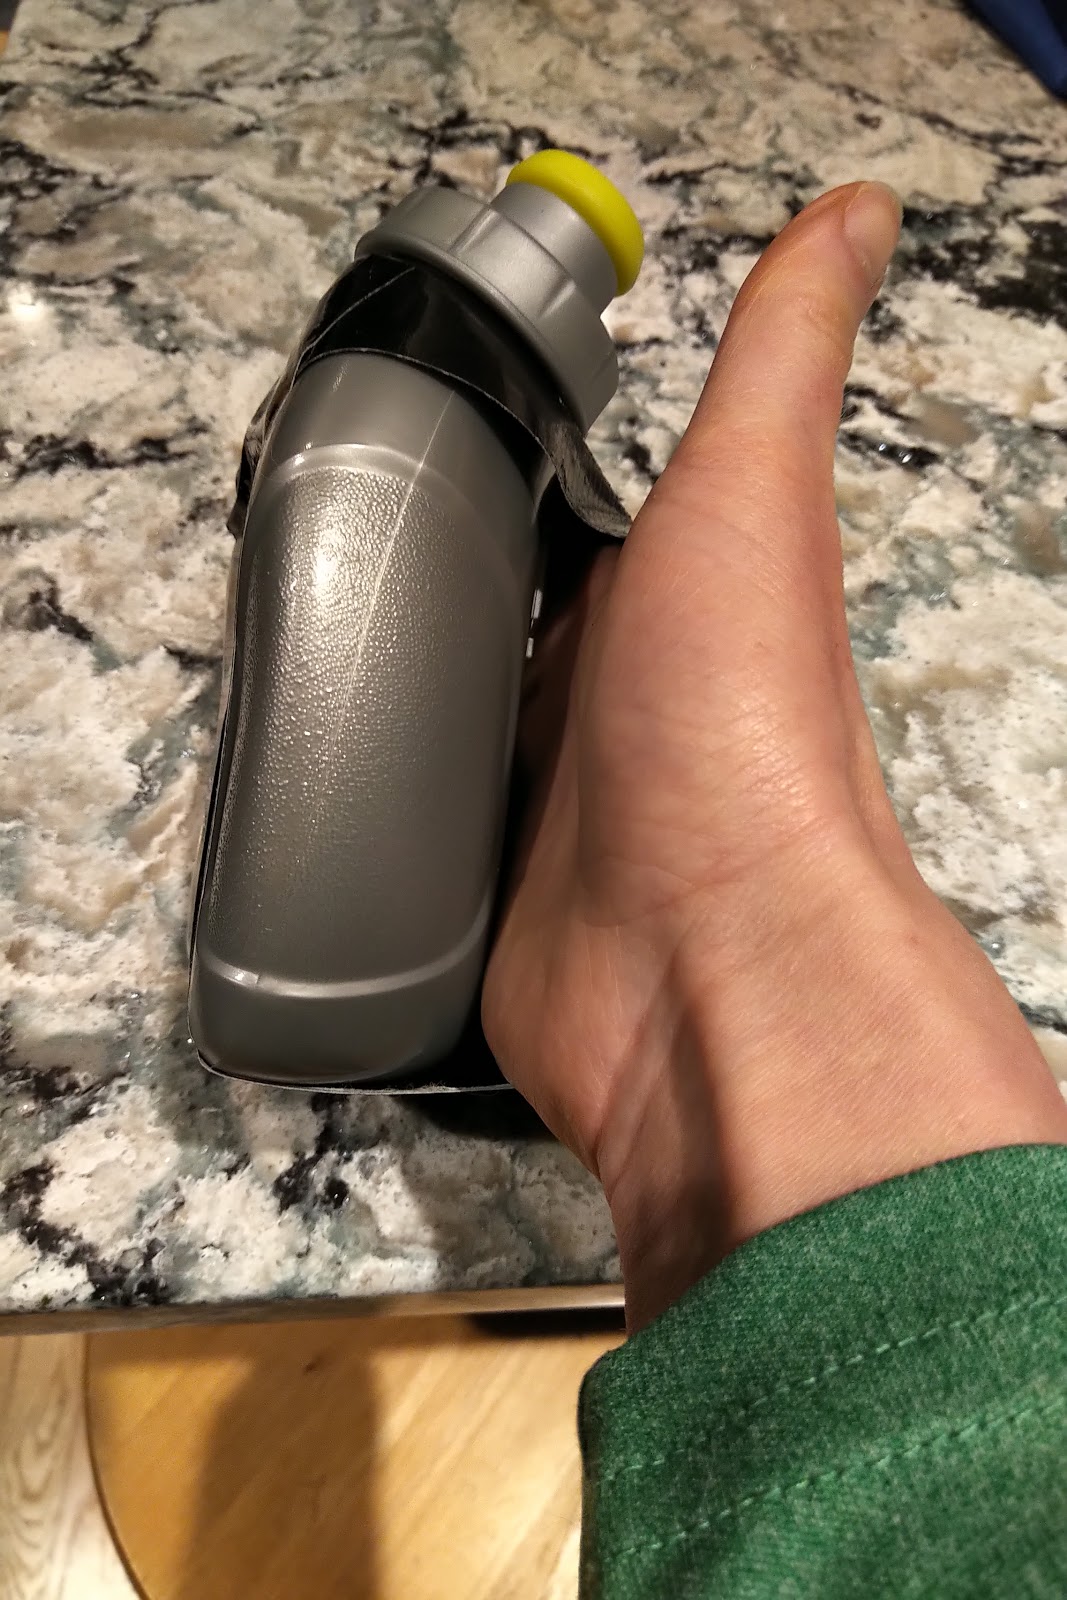
Insert the neck of the bottle into the hole you just created, then loop the rest of the duct tape around the bottle.  If you've measured the length of your doubled-back tape just right, it will form a nice loop for your hand, with the doubled-back section of the tape ending at the bottom of the water bottle.  Continue wrapping the duct tape around the bottom of the bottle and up the other side, with the sticky side of the duct tape adhering to the water bottle.  

5)
Cut the tape near the top, and then affix that sticky end of duct tape over the bit of tape that extends from the neck of the water bottle.

6) 
And....that's it.  You can either fill up the bottle, screw the cap on, and go on your way, or alternately peel the tape off and redo it if you're not happy with your initial result.  Once you've got a bit of practice, this takes all of 60 seconds to do.  (Of course, it often takes me a bit longer than that to track down the scissors and tape...).

As for how I use my water bottles when racing?

(well, besides the obvious, which is that I drink from them....)
Me carrying a hand-held at both Richmond Half and CIM;
I think carrying the water bottle helped immensely in both,
despite cool temperatures.  Photo on the left by Cheryl Young; 
photo on the right purchased from FlashFrame photography.

As I noted above, I like to start any race that is 10 miles or longer with one of them, unless I'm fortunate enough to be running a race where they'll let me set out water bottles in advance.  I'll carry a bottle even if it's cold - I train with one all the time, so I'm very comfortable carrying it, and I don't think it slows me down at all.  

Plus, my coach has emphasized that staying hydrated can be important even in cool conditions.  While you're unlikely to collapse from dehydration in 40 degrees, you do still sweat a bit, and staying hydrated throughout the race puts me in a better place to close hard in the last miles.  Better hydration -> higher blood volume - > better energy delivery.

I'll sip continuously from the bottle as I run (using water stops as a reminder to sip, if I haven't done so in a while).  When my bottle is empty, I'll unscrew the cap and tuck it into my sports bra.  Then, at the next water stop, I'll slow to a jog, grab a cup, and pinch that cup to make a spout.  Then I'll pour the cup into my water bottle.  (if there's little water in the cup, I'll grab a second and repeat this process).  Then screw the cap back on (still jogging), gently re-accelerate, and merge back into the race.

I lose only 2-3 seconds doing it this way, less than I would lose if I stopped or walked at the water station.  I don't try to make up the few seconds I've lost by surging - doing so would just waste valuable energy (think of it this way: when you're trying to make it home on a single tank of gas, you don't floor the gas after a stop light).  Instead, I consider the few seconds spent at the water stop a valuable investment in the final miles.

Thursday, June 1, 2017

The pre-run routine

In a recent race report, I referred to my 15 minute pre-run routine to get everything stretched out.  In response, I fielded several requests to post my routine.  Sure.  It's below.

But first, a disclaimer (because I'm an attorney, and such things are second nature).

This is MY routine that addresses MY specific weaknesses.  I'm not recommending this as a general routine for others.  I think that most runners could benefit from a pre-run routine, especially those who are older or injury-prone.  But the structure of that pre-run routine should be individually tailored to that runner's needs.

***

So... what are my issues?  Currently the big ones are:

  • a wonky left SI joint that likes to pop out of place when I'm asleep (and yes, I've tried different sleeping positions).
  • very tight psoas and quad muscles
  • a right abdominal muscle that likes to fall asleep
  • glutes that like to fall asleep
  • shoulders that are usually tense and tight.
***

The routine to address my issues, in chronological order:

  1.  A yoga supine spinal twist: I lay on my back and then pull one knee into my chest while the other leg remains extended.  Then I twist across my torso - pulling the left knee across to the right, or vice versa.  Most mornings, I get a nice pop in my left hip when I do this (and I walk much straighter after).  Occasionally I get a pop in the right hip, though that's the exception, not the rule
  2. Several gentle lunges, alternating right and left leg forward.  I start with low lunges on each side (hands on floor) and build to a high crescent lunge on each side (torso erect, arms extended above).  Between each lunge, I return to a down dog pose, often including a down dog split pose where the leg that was just forward is now extended and curved behind me.
  3. A warrior two sequence.  I assume warrior two pose from yoga, holding for 5 breaths.  Then into extended side-angle pose, with one forearm gently resting on my knee while the other arm extends overhead.  I prefer the variant where the forearm rests on my knee over the version where one's hand touches the floor because I find the first to be a better stretch for the psoas.

    While holding side angle pose, I do five slow large circles with the extended arm - basically a backstroke-type motion.  Then I return to warrior two.

    Next, while still in warrior two foot pattern, I clasp my hands behind my back and perform a version of humble warrior two, but with my torso folded down halfway between my two legs (traditional humble warrior two has the torso fold much closer to the front leg).  When done this way, it's a nice groin stretch.

    Then I return to warrior two, and stretch backwards into reverse warrior.  Hold for 5 breathes.  Then return back to extended side angle pose for a second time, this time holding the pose stable for 5 breaths, feeling the nice psoas stretch.

    Once I've done that all on one side, I repeat on the other.
  4. Quad stretching.  I hold the couch stretch as defined by Kelly Starrett for 3 minutes on each side.  For the first minute, I lean fairly forward, for the second minute my torso is at roughly a 45 degree angle from the floor (and the wall).  For the third minute, I'm limber enough for my torso to be roughly perpendicular to the floor (as shown in the picture).
  5. Turning on the abs - I lie down on my back again, and perform 10 eagle crunches on each side.
  6. Turning on the glutes - I perform single-leg deadlifts on each side, holding a old closet rod in both hands as a balancing aid (I find it easier to do single-leg deadlifts with a light bar than with nothing at all.  I suspect this is for reasons similar to why tight-rope walkers use a bar for balance).  I don't have a prescribed number of repetitions here - I do the deadlift motion until it feels easy and I'm not wobbling - at that point, my glutes are awake.
  7. Tight shoulders - I place a tennis ball against a wall and self-massage my shoulders, back, and pectorals, working out all the knots (there are always knots).
Then, I'm done.  That's the 15 minute routine (longer if the cats try to help).  

***

The abbreviated version includes steps 1 and 2, plus extended side angle (from step 3) on each side for 5 breathes.  Then I hold the first minute of the couch stretch (step 4) before skipping step 5.  I do a few quick deadlifts on each side (step 6), and then skip step 7, heading out the door.

I do the "full routine" before any key run - i.e. a race or a workout.  For other runs, I prefer to do the full routine as well, but often I'm crunched for time and do the abbreviated version.  

I never run without doing at least the abbreviated routine.  It's simple - if I don't warm-up before I run, I have a lousy awful run and feel sore after, with my traditional injury areas flaring.  If doing the routine means that I'm late for my run, then so be it.

I'll also do parts of this routine (especially the couch stretch) at other times in the day as well.  The more open my hips are, the better.

***

One obvious question is whether the order I do these exercises in matters.  The answer is yes, if I'm doing these in the morning, pre-run.

I always start with getting my SI joint in whack. (Why do we say "out of whack" but never "in whack"?)  I need to have my hips level before doing anything else to stretch or activate.  

Steps 2-4 are all hip/groin stretches increasing in intensity.  Were I to do the couch stretch first, I'm afraid I'd pull something.

Once my hips are open, then I get the abs engaged with step 5.  I've found that if my hip flexors are tight, then they do some of the work that my abs should be doing, so I prefer to loosen the hip flexors with steps 2-4 before targeting the abs.

The glutes (step 6) come after that - in order for my glutes to fire correctly, I need to have my hips open, and having my abs engaged helps.

The final step, tennis balling my shoulders, is the one exception - that one can be done at any time.  Or shortchanged, if I've got limited time.  I put it last simply because it's the lowest priority.

The other obvious question: where do I get the time?  

Honestly, I just make it happen.  Like brushing my teeth or cleaning the litter box - two other things that must get done before I leave the house in the morning.  I get up earlier in the morning to fit it in.  And if I have to start my run later and run less miles, then oh well.  

Avoiding injury is much more important than any individual run.  

Wednesday, January 6, 2016

What I wore

The DC area has been hit by another cold snap this week, resulting in frigid temperatures that rival the north.  Yesterday morning, the air temperature for our workout was 15 degrees Fahrenheit, with a wind chill of -5.

I try not to complain too much about the cold (though I do whine some).  For one thing, I believe that the more you whine about the weather, the worse you perceive it.  And running-wise, I much prefer 15 degrees to 80 degrees and humid - I find it much easier to breathe in the former.

Plus, I have running friends in New Hampshire and Minnesota and other such places, and I really can't complain in any medium that they might be reading (though I do want to note that yesterday it was actually colder in DC than it was in Duluth, Minnesota).

However, without whining, I do want to note that it was cold yesterday.  Colder than it's been for about a year.  Which means it's been a year since I dressed for these conditions.  Which means that I was rummaging through my closet early that morning, trying to remember what I wore last year.

And so, I am now going to document what I wore, and what worked very well for me.  This may help others; I know it will help me in a year's time.

You can click on this to expand it.  As you can see
artfully arranging things for nice blog pictures is not in my skill set.
First, a picture:

A) thick headband
B) snowboarding mittens
C) clear lens sunglasses
D) sportsbra
E) tights
F) thick longsleeve
G) compression shorts
H) running jacket
I) disposable handwarmers
J) petroleum jelly
K) thin socks
L) "anklewarmers"


And next, the description.  I do want to note that my personal thermostat is a bit wonky, due to some autoimmune/circulation issues.  I tend to be very cold when I'm still, but warm up rapidly when I run.  Furthermore, my core tends to overheat, while my extremities stay very cold.  So, the balance I've struck here may not work for all.

For my lower half,

I wear compression shorts (G) underneath a pair of fitted running tights that are not super tight (E).  For workouts, I've found I prefer looser tights that let my legs to move more freely than compression tights allow. 

I layer the compression shorts under the tights to make sure my hamstrings stay warm, given my past history of injury there.

For my feet/ankles,

I wear very thin socks (K), and then homemade "anklewarmers" (L) to cover the gap between my tights and socks.  It may seem surprising that I don't wear thicker socks, but my cold feet stem from lack of circulation, and thick socks crammed into shoes just make things worse.  The pounding from running does a good job of warming up my feet and keeping the blood flowing, so I just deal with numb toes for the first 10 minutes and then I'm fine.

Close-up of the anklewarmers
(my cellphone camera ain't great)
I made the anklewarmers by taking a cheap pair of thick tube socks and cutting off the foot.  (I made a second pair from cutting the toes off of the remaining foot).  I have a history of tendon issues in my ankles, and I've found that keeping the gap between socks and tights covered and warm is essential to avoiding injury.  This is why you will never see me wear capri tights - because they cover my knees (which rarely have any issue with the cold) while exposing my sensitive ankles.  Right fabric, wrong place.

For my upper body,

I wear a sportsbra (D), and then one of my thicker longsleeve t-shirts (F) (white, because we're running on streets in the dark).  While warming up for the first mile or two, I'll layer a running jacket (H) on top - that jacket gets shed before any hard running. 

If I'm just running easy mileage, I'll go with a tanktop instead of sportsbra, plus just the running jacket without longsleeve.  Longsleeve+running jacket works well for the first few miles of a run, but I'll be massively overheated by the end of 8-10 miles.

For my hands,

I wear snowboarding mittens (B).  The snowboarders and skiers really are the experts when it comes to dressing for winter conditions - I really don't understand why most runners limit themselves to running gloves.  In my experience, the cheapest snowboarding mitten is more durable and warmer than the priciest running glove.  Plus, manual dexterity is not important to running, so there's no specialized function inherent to a running glove.

(Seriously, why do we need separated fingers?  Other than to flip off motorists?  Which actually is a pretty good reason, come to think of it.)

Within the mittens, I carry disposable handwarmers (I).  I swear by these - they make a massive difference and really don't cost much in the broader scheme of things.  By my math, seven pairs of handwarmers costs less than one cup of coffee from Starbucks, and keeps my hands a lot warmer over a week.  Plus many types of handwarmers can be "suspended" by sealing them in an airtight bag between runs, so that you get two or three runs out of a pair.

For my head,

This one's easy - thick headband to cover my ears (A), and petroleum jelly (J) glopped on my face. Trust me, don't apply it, glop it.  The thicker the better. 

I religiously use the petroleum jelly any time the temperature drops below 40, or it's windy, or it's raining - it protects my face from the elements.  I've tried balaclavas, but generally am not a fan - I don't like breathing through them.


I prefer the headband over a beanie or similar because it works better with my ponytail.  I know some beanies have ponytail holes cut within them, but the opening never aligns with my ponytail.  Additionally, beanies never stay in place on my head, while headbands generally do.  Factoring into this decision is the fact that my long hair already provides some natural insulation - only my ears need protection, not my scalp.


***

So, how did it work?  Pretty well. I was cold for the first mile of my warm-up, and then fine.  I shed the jacket after warming up, and was cold for the first repeat, and then fine thereafter.  By the end of the workout, I was barely starting to break a sweat, which tells me I got it right.  I didn't want to be cold, but it would be worse to start sweating and then REALLY get chilled.

The one thing that didn't work was my sunglasses with untinted lenses (C).  I wore these yesterday morning in hopes that they would protect my eyes from the wind.  However, I found that even the clear lenses interfered unacceptably with my night vision - preventing me from seeing the details of the road.  Additionally, they kept fogging up.  They ended up with a free ride on top of my head for the workout.

One thing not in the picture above, but essential nonetheless, was a sense of humor.  If you can manage to laugh, just a bit, at the absurdity of it all, you'll find the air is less biting.  And good running buddies are key also, as they make wonderful wind blocks, both physical and mental.

Thursday, February 19, 2015

Injury prevention work- the 2015 edition - part 2.

Continuing on with my series, I'll focus on my daily routine.  This is my OCD stuff - the stuff that I try to do EVERY single day, regardless of sickness, travel, fatigue, etc.  They're not draining exercises, so they don't take much out of me exertion wise, though they do take time.

As with my pre-run routine, they focus on my specific issues, including ankle instability, tight hip flexors, and weak feet.

The daily stuff:

Ankle strengthening: Developing my ankle strength and proprioception is a continuing battle.  My biggest exercise for this is my wobble board, which sits in my kitchen.  I have a workout of "4x1:00" programmed into my Garmin (named "balance board"), with the Garmin helpfully buzzing me at the
conclusion of each minute.  I stand atop my balance board with both feet equally spaced, and rock the board back and forth for one minute.  Then side to side for one minute.  Then round the world, tapping at 12, 3, 6, and 9 on the imaginary clock face for a minute before reversing the direction and going round the world the other way for the final minute.

That's my default exercise - done at least once and hopefully twice each day.  I will supplement or substitute sometimes by using a stretchy elastic band to work my ankle.  I loop the band around my mid foot and a solid structure, and then perform inversion and eversion exercises with each foot - I do 4 sets of 10 reps each foot, split as 10 reps each of eversion with foot pointed, eversion with foot flexed, inversion with foot pointed, and inversion with foot flexed.  Then repeat on the other foot.  I try to do this one once or twice a week in addition to the wobble board, but will also use this to substitute for the wobble board when I travel - the stretchy band travels much better than a wobble board.

Another exercise I do from time to time for my ankles as a sub or adjunct to the wobble board is closing my eyes and balancing on one foot - I'll cover that more in part 3 of this series.

Foot strength:  Here, I'm focusing on both my general foot strength and my big toe strength.  Each day, I try to spend 2 minutes each foot either a) scrunching up a washcloth with my toes or alternating pressing my big toe and my four other toes into the floor ("toe yoga").  Either exercise travels well, and the towel exercise works very well for multitasking - do it in the kitchen while cooking something in the microwave. 

Toe yoga can also be done during boring meetings, preserving foot fitness and sanity via muscle contraction.  Eyes closed balance also works well for general foot strength (though perhaps not the best choice for entertaining oneself during a meeting).


Hip Flexors:  I try to dedicate about 10 minutes a day to a combination of two stretches, each of which was also described in part one of this series.  One is the couch stretch, the other is the kneeling hip flexor stretch.   Each day, I'll do one exercise for 3 minutes each side (timed on my Garmin), and the other for about 90 seconds each side.  Why so long?  Because that's supposedly how long it takes to cause an actual long term lengthening of the tissue (if repeated consistently).


Foam rolling:  Yup.  Though not specifically an exercise, it's something I do everyday.   The amount I do varies from day to day, depending on how much time I have, what else I've done that day, and how I'm feeling.  I have a wide variety of tools - including a range of rollers from very soft to hard and spiky, plus sticks, balls, and oddly shaped devices - which ones I use depend on what I'm doing that day.

I view foam rolling as an exercise that benefits me in the long term, but does place additional stress on my muscles in the short term.  For that reason, I keep the rolling gentle and brief on my hard workout days - using my softer rollers.  On those days, my muscles have already done a lot - I foam roll gently to improve circulation and encourage recovery.

Most of my collection.
Someday I'm going to start a companion Tumblr account,
entitled "Recovery Tool or Marital Aid?"
On other days, I'll go a bit harder - digging into my tight spots.  I start with my softer roller to warm up, and then move to the firmer rollers before shifting to the individual devices - a tennis ball for my glutes/piriformis, the R8 Roll Recovery for my quads, adductors, and hamstrings, the TP footballer for my calves, and the Stick for my shins.  And a golf ball, Footrubz, or foot roller for my feet.  I'll also use the Triggerwheel (my absolute favorite device) for targeting muscle knots, especially in my posterior tibialis or peroneal.

Obviously, I can't take this all with me when I travel.  If I'm traveling very light, I make do with a softball (can sub as a foamroller in a pinch), the Footrubz, and the Triggerwheel.  If I have a bit more space, I'll also take the Stick, a short foam roller, and/or the Roll Recovery.

Next week, I'll go into my strength building exercises.

Tuesday, February 10, 2015

Injury prevention work- the 2015 edition - part 1.

As the astute reader may have noticed, (I'll confess, I had to Google "astute"), I frequently reference "injury prevention work" in my weekly log?  So....what exactly is that?

(several people have asked me just that question - hence this series of posts).

Well...it's a lot of things.  As an injury prone runner, I probably spend nearly as much time on injury prevention work as I do running.  "Injury prevention - it's a lifestyle choice."  Or something like that. 

It probably works best to break this discussion into categories - mainly pre-run prep, daily maintenance, and regular strengthening (done 1-3 times a week).  In describing them, I'll hit one per post, starting with today's post on pre-run prep.

Pre-run Prep:

These are the exercises I do before every run, to get me ready to run.  I'm a bit hesitant to publish them, not because they're secret or proprietary, but since they are what I need in order to be ready to run.  They are focused on my weaknesses and imbalances.  I strongly doubt any other runner has exactly my imbalances; we all have our own little issues.  So take this as an example of what one person does, rather than a specific model to emulate.

My specific issues are: hip flexors that get very tight and pull stuff out of alignment; glutes that like to turn off (especially right); a pelvis that likes to get slightly twisted; and a right ankle that likes to "lock up."  If I run with these issues acting up, at best it's a lousy run where I feel like I'm driving a car with a flat tire; at worst I get injured.  So they need to get fixed.  Again, and again, and again.  These exercises are not optional - if I oversleep, I just run less so I can fit them in before.

Hip Flexors: My prep starts with stretching out my psoas and quads - ideally stretching each for a minute (so total of 4 minutes and change here).   For the quads, I use a shortened version of the "couch stretch" (again, just a minute).  For the psoas, I use the "kneeling hip flexor stretch" shown here.  (note - sometimes if my knees are a bit tender I do a standing quad stretch in lieu of the couch stretch - not bearing weight on my knee makes the stretch a bit gentler on the tendons in that area).

Ankle: After that, a pre-flight check.  As I noted, my right ankle likes to lock up - lax ligaments (much tightened by prp/prolo, but still not perfect) allow bones to shift slightly, especially my tibia and fibula.  The shifted bone/s then block my ankle joint, somewhat akin to a rock getting stuck in a hinge.  This has the expected result - my ankle can't dorsiflex the way it should, which throws my whole gait off.  Imagine running with a pebble stuck in the front of your ankle - that's almost exactly what it feels like.

So, pre-run, I need to make sure the ankle's working.  I start by performing a lunge with my right foot forward.  Is my ankle moving freely forward in a full range of motion, or is it blocked, causing my shin to collapse to one side or the other if I try to force it?  If the latter, then I need to fix it, which I do via this exercise and a looped yoga strap I keep tied to a piece of heavy furniture.  Essentially I step into the loop of the strap so that the strap lies against the front of my ankle, and then gently flex my ankle by squatting/lunging.  I repeat the "talo-crural" mobilization and the test lunges until the ankle's behaving itself.  Credit to Sport and Spinal PT of DC and Robert Gillanders for teaching me this one.

(occasionally my ankle also locks up mid run - if that happens I can also do a bastardized version of the mobilization by using my hand to replicate the band across the front of the ankle.)

Hip/pelvis alignment:  My next step is to check my hips and make sure everything's straight there.  I do this by performing this "running man" exercise that I learned at Capitol Rehab in Arlington.  If everything's good (about half the time), then I perform the exercise equally well on both sides.  If I'm out of whack, then I balance very well on my left, and struggle on my right.

I fix this by realigning - I lay on my back, with my hip and knees both flexed at 90 degrees, and run a stick in front of my left quad and behind my right hamstring, holding each of the stick ends with my hands.  Then I simultaneously pull my left quad in towards me while contracting the right glute to drive the right leg out, with each leg pressing against the stick.   Hold for 3-5 seconds, and then repeat a few times.  Follow this up by letting my feet fall to the floor as if I was going to do a bridge, and sticking a yoga block between my knees.  Squeeze the block hard for a few reps of 3-5 seconds - at some point I usually feel a satisfying "pop".

Then get up and repeat the running man exercise.  If I'm balanced, then yay.  If not, back to the floor for another round.

Glutes:  Finally, after hips and ankle are good, I activate my glutes.  I do this by returning to the floor in prep for bridge pose - back and feet on floor, knees flexed.  I then pull one knee into my chest, which forces me to hold my back in a neutral position so that I have to use my glute (otherwise I end up using my back).  Then I perform a one legged bridge, making sure that I feel the glute firing, and repeating until the glute is working without me needing to think too hard about it.

After all this, I'm ready to run.  Of course, if I have a long car ride between now and my run, I may have to repeat some of this once I'm on site, but it's much abbreviated.

***

How much time does it all take?  Well, I generally allow about 25 minutes in the morning for it.  I generally don't need all that - it really depends on how I am.  If I'm training really heavily, or (ironically) have slept really soundly, then it takes more time to get going - everything's just so stiff.  The good thing about occasional insomnia is that when I do get out of bed, it doesn't take too much prep to get stuff working.

Murphy's law does dictate that if I don't allow for the full 25 minutes in my morning pre-run, then I will need that time.  And that means that I end up late for (or skipping) the run.  I hate missing runs, but it's better to skip a run than to run with my body out of whack and get injured.  One unplanned day off is better than several.

Coming next week: my daily routine.


Monday, March 4, 2013

Mix tape

So, I know plantar fascitis.  I've dealt with it again and again, missing key races (including my goal marathon last fall).  Currently, I'm doing well, but I'm always aware of the potential for it to reappear.  Sadly, I also have friends who battle it.

One of my big allies against plantar fascitis is tape. There's a wealth of information on how to tape, with two methods getting the most attention:  the lo-dye taping method (using athletic tape) and kineseo taping.  I've tried both, and found neither to work perfectly.  The kineseo taping method gave too little support when running.  In contrast, the lo-dye method was too restrictive -- the arch of the foot acts as a spring, and the lo-dye method completely locked that spring in place.  As a result, my foot felt like a block, not a spring, and all sorts of other muscles became stiff and sore in compensation.

However, a combo of the two taping methods -- essentially the lo-dye taping method, but substituting kineseo tape (can be KT tape, Rock Tape, or something else) for certain parts, works fantastically.  Here's how I do it.

What you'll need:

-one roll kineseo tape (I prefer Rock Tape, because it seems most durable and has cool pattens)
-one roll sports tape (1.5 inch wide)
-one roll cloth or sports tape (1 inch wide)
-scissors
-one knee length stocking

Note - when applying this tape, keep your foot gently pointed.  The objective here is to contract the plantar fascia slightly (to take the strain off) and then lock it in that position.


Step 1: 


Place an anchor strip of 1.5 inch sports tape
across the ball of your foot.
Step 2:
Take a long strip of 1" tape, and
run from ball of big toe across foot to heel,
loop around the heel and then back to ball of big toe.
Step 3
Take a long strip of 1" tape, and
run from ball of little toe across foot to heel,
loop around the heel and then back to ball of little toe.
Step 4-5
Take two more long strips of 1" inch sports tape;
loop one from ball of big toe to behind heel to ball of little toe;
loop the other from ball of little toe to behind heel to ball of big toe
(essentially making two "X"s, one atop the other)
Step 6
Take several short strips of 1.5" sports tape,
and run each laterally across the bottom of the foot,
starting at the heel and working forward to the ball of foot.
Each strip should overlap the previous one slightly.
What this step looks like when completed.

Step 7
Now you get to use the Rock Tape. 
Run a long strip of it (stretching it very slightly)
from the outside of your little toe
around the outside of your heel to
the outside of your big toe.
You want to cover the ends of the strips of sport tape
that cross your foot.

 Step 8

And...take your second strip of Rock Tape,
and run it laterally from the top of your foot
(above the metatarsals) laterally under the ball of your foot
and around to the other side, essentially circling your foot at the ball.
Slight tension here.  This locks the whole thing in.
(it should cover both ends of the previous strip of Rock Tape)

Another view of the completed job
Step 9
Final step - cut the knee length stocking so that it just covers your foot,
and then slip it on over your tape job. 
This makes it much easier to put on socks/shoes without disrupting your tape job.

Fin!  

[goes without saying, but I'll say anyway - I am not a Doctor, PT, or other rehab expert.   (nor do I own stock in Rock Tape).  Use this at your own risk.  And if you're at the point where you're taping your PF, you really need to see a professional anyway.  But hopefully this is still helpful.]

Thursday, June 28, 2012

Safety Dance


So, I've read a lot recently about safety while running, especially for women.  It's a topic that re-emerges with each news of an assault.   Everyone agrees that women should be cautious and use "common sense" when running.  And there's a ton of standard recommendations that get trotted out.

I think a lot of those recommendations are wrong.  For one thing, I think that exactly what comprises "common sense" depends on the environment that you're running in.  Additionally, many recommendations are focused on responding to a bad situation once you're in it; while your focus really should be avoidance.

Below are some of the "common sense" recommendations, followed by my thoughts.

  • Carrying a phone.  Everyone spits this recommendation out reflexively.  But, depending on your running environment, it may be a poor one.  If you're running in a more rural environment, where your greatest risks come from getting lost, getting injured far from home, or a disastrous wildlife encounter, then yes, this may make sense.

    However, for those of us in an urban environment, a phone or PDA isn't such a hot idea.  The risks we face are different.  It's very unlikely that we'll get truly lost (i.e. without being able to ask someone how to get back), and if you get injured, simply hail a cab (carry a bit of concealed cash for this option).  In the city, you can always duck into a nearby 24 hour market if you need. 

    And in the city, carrying an expensive bit of electronics in your hand just marks you as a target, IMHO.  Some people would suggest wearing a small running backpack, fanny pack, or similar, but that also places you at risk, as someone carrying something potentially of value.

    I occasionally (very rarely) run around my urban neighborhood in the evening, after dusk.  I believe I am much safer running unencumbered around my neighborhood than I am walking around my neighborhood with a purse at that same time.  It's safer to appear to be carrying nothing of value, and so that's how I prefer to run.


  • Pepper Spray/Weapons.  There's a big industry based on sales of pepper spray, and obviously an even bigger one dedicated to firearms.  But...do you really know how to use the weapon in an actual fight or flight situation?  And are you truly capable of doing so without hesitation?  I honestly think that most people who answer yes to the above are deluding themselves.
    So very intimidating.

    Furthermore, if you're going to carry it, you need to be able to use it instantly.  It's not like your assailant will walk up to you and give you 10 seconds notice to get prepared.  So, no carrying it in a holster, fannypack, backpack, or pocket.  It needs to be immediately at hand.  And that's not really practical.

    I think that, for the vast majority of people, any weapon that they carry is far more likely to be used against them.  It increases the risk.  Additionally, people let the fact that they're packing something color their judgment about where and when to run.  Again, the priority needs to be situation avoidance, not response.

    That being said, I do carry one "weapon" with me.  My keys.  I have a loop that attaches the keys to my wrist, and then I hold them in my hand.  Shift the keys so they stick out between your knuckles, and congratulations, you've got a weapon.  To be used only if you get into the situation that you're going to do anything to avoid.


  • Self-defense.  People crow about how great it is to have taken a self-defense class. And sure, in some ways it is.  But only if it doesn't color your judgment about which situations to get into.  And thing is, I think self-defense training, like weapons, give a false sense of confidence. 
    Self-defense guru.


    Self-defense classes do NOT make you an effective fighter.  At best, they maybe give you some slight hope if you are trapped.  But best not to be trapped.  If you wouldn't run somewhere or at some time but for the fact that you've taken a self-defense class, don't run there or then after you've taken a self-defense class.

    I'm not opposed to self-defense classes, just to the bad judgment calls that may result.  And, IMHO the best self-defense training is 200m sprint repeats.  Something to think about.


  • Go with your gut.  And also beyond your gut.  The first part of this is pretty simple -- if you've got a hunch that something's a bit sketchy, heed that hunch.  Don't go down the alley that gives you that funny feeling.  Give an extra berth to the guy that gives you the creeps.

    You should be uncomfortable
    running alone here.
    But also, ignore your instincts sometimes.  The most dangerous people are those that set you at ease.  If you see a person hurt on the bike path and you're by yourself, don't give into your sympathies and approach him to help.  Ask him from a safe distance if he's OK.  If he needs help, run to your nearest coffee shop/gas station and call for help from there.

    On this same note, while our instincts are to avoid the dangers that we see (the sketchy looking guy), we need to focus on the dangers we may not see -- the person lurking in the bushes on the side of the trail or in the shadowy doorway.  A large part of my focus when running is on areas just ahead of me, and potential hiding places.


  • Your reaction.  So many times, I've heard someone say that the best way to react to someone that does give you a bad feeling is to ignore.  I disagree.   Ignore someone and stiffen, and you remain an anonymous "it" to that person.  Make eye contact and smile or say something, and you're a person. A sister, mother, daughter, friend.  You're safer in the latter category.


  • Headphones.  OK.  On this one, I agree with the majority.  Running with headphones is a bad idea, and puts you at risk.  And yes, I understand the standard retort - "I keep the music turned low" or "I only wear one bud."  But, neither of those address the underlying risks.

    First of all, if you wear headphones, you appear to be less aware of your surroundings.  Maybe you're not.  But you look like you are, and that makes you an appealing target.

    Secondly, it's not just that you can't hear dangers with your headphones, but that you're not focused on avoiding bad situations. Runners who run with headphones do it to disassociate - it distracts them from discomfort and tedium.  But, it also distracts you from your surroundings, by diverting your attention.  Making it more likely to get into the bad situations that you need to avoid.


  • Others' knowledge of your route.  There are certain people that you want to know of your route:  loved ones, friends, etc.  For this reason, in the past I would email my boyfriend when I was going running and returning -- a habit I've gotten out of, but want to restart.  To that point, I've also invested in the Garmin GTU 10.  It's the same size as my asthma inhaler, and so fits easily in a pocket.  I carry it with me, and my boyfriend can access my account on the Garmin website.

    There are also people who you DON'T want to know your route.  And that includes both people you know and people you don't.  It's a really bad idea to give too much detail about your normal running routes on line.  Some stuff is pretty safe -- for example, I sometimes run on the C&O Towpath in DC.  Just like 20 million other people.  I have no concerns about posting that.  But you don't want to give enough information that people can track you down.
    My GTU - ain't it cute?

    To this same point, if you do get a Garmin GTU or similar, it should go without saying that your account on the tracker's website needs to be secure.  That means no password of "password" or "changeme" or "garmin."  Also, no password of "password1" or "changeme1234" or "3gar5min."  It's truly amazing how many people think that a password is secure if they take a word and append a number or two to the end.  Or the number of people who are sure no one knows their mother's maiden name.  If someone gets your password to a tracking site, then they can track you with ease.   Here's some basic info about secure passwords.
There's probably a lot of people who think I'm paranoid.  And a lot of them are probably guys.  That's OK with me - I prefer to err on the side of caution and common sense.  Ultimately, the balance between safety and convenience is individual to each of us, but I'm hoping this post is food for thought for others.

Thursday, May 24, 2012

Injury Prevention Work

In my weekly training log, I'll often reference injury prevention exercises.  Ever wondered what those were?  Here they are.

Keep in mind that this is my routine, to address my weaknesses (ankle and foot weakness, glutes that don't fire, a tendency for runners' knee, and poor bone density in my spine).  Everyone's different, with their own areas to target, so these may not work for you.

I split my injury prevention exercises into two categories - "challenging" and "easy".  The "easy" ones are those that don't take much out of me, and that I can do every day without fearing that I'm compromising my recovery or taper for my next race.  (and I do try to do them daily)

The "challenging" ones are more physically demanding -- I always do these immediately after my hard running workouts, as the final part of the workout.  That way, I have the maximum time to recover before my next hard running workout (and running IS the priority).


Easy  I shoot for doing these daily, or at least 5 times a week. They don't drain me, so the only reason not to do them is time.  And I've decided that the time spent doing these regularly is more beneficial to my overall running progression than an extra 5-10 easy miles a week.  First rule of improving in running - don't get injured.
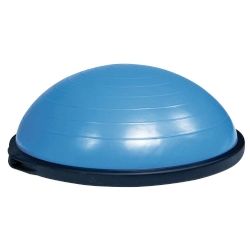
Bosu.  I have the flat side up
  • Hip hikes. Video here.  Balance on one foot barefoot, and "hike" the other hip for one minute while maintaining correct posture (important).  I do for 60 seconds on each side.  Good for stability and glute activation, plus foot strength.
  • Balance on one foot on bosu. Take a bosu, and turn it round side down.  Then balance on one bare foot for one minute while swinging the other leg like you were running.  Again, posture is key.  Addresses the same issues as the hip hikes.
  • Stool dips.  These are a great exercise that target the glutes and quads, but also get the feet and lower legs.  I balance, barefoot, on a 12 inch plyo box.  I then balance on top of the box/pad on one leg, with the other leg held straight and extended in front of the box.  Then, I bend the knee on my standing leg and perform a controlled single leg squat until the heel on the other leg gently touches the ground, then rise back up.  I do 10 of these on each leg, and then a second set with my dangling leg to the side (rather than to the front).  Big point again is to maintain correct posture and not let one hip or the other collapse.
  • Balancing with my eyes closed.  My nemesis.  I've programmed my Garmin to a "workout" of 8 times 25 seconds on, 5 seconds off.  The Garmin vibrates at the end of each 25 or 5 second interval.  So, start the Garmin, and balance on one foot with my eyes closed for 25 seconds.  Then take the 5 second break to open eyes and shift to other foot.  I do these barefoot.  And I stink at them.  But I will master them.
  • Picking up stones with feet   I keep a small tub full of stones near my sofa.  When I get a few minutes free, I empty the stones onto the floor and then pick each up individually with my feet to return to the tub.  The purpose is to strengthen my feet.
  • Towel scrunches  While my breakfast cooks in the microwave, I toss a towel on the floor and scrunch it up under my toes.  Again, feet strength.
  • Toe yoga.  Name for this was coined by my PT.  Push big toe down for 5 seconds while lifting other four toes up.  Then lift big toe up for 5 seconds while pressing other four toes down.  Repeat for 2 minutes.  Added bonus is that you can do these at any time -- those of you with office jobs and closed toe shoes could even do during meetings.
  • Foot band exercises.  This is ankle inversion/eversion, using a theraband (those latex stretchy bands).  First, tie a loop in one end of a theraband, then tie the other end to something.  Now, stick your foot into the loop, so that the band is around the foot roughly half-way between toes and heel.  Move far enough back that there is tension in the band, then slowly first "invert" your foot against resistance (move the inside of your foot more to the inside) for a set of reps, then "evert" your foot (move the outside of your foot more to the outside).  I do 20 reps each of inversion and eversion on each foot, for 80 reps total, on a daily basis. (here's another article explaining).   These work the anterior tibialis, the peroneals longus and brevis, and the posterior tibialis.
  • Eccentric calf dips Video.  These are the gold standard for addressing (or preventing, which is even better) achilles tendonitis.

  • I use a body bar like one of these
    for my anterior tibialis
  • Anterior tibialis lifts.  This strengthens the anterior tibialis muscle on the outside front of the shin.  I take a body bar, and (while standing) place one end on my toes while holding the other end of the bar in my hand.  Then I lift the bar with my toes.  I do sets of 10 reps; weight between 12-15 pounds.

  • Marching glute bridges and side planks with leg lift.  For engagement and strengthening of glutes medius and maximus.  My PT explains them very well, so I'll send you to his write up (go to pages 10 and 12).  I aim for 3 sets of 10 for each daily.

  • Single leg deadlifts  Balance on one nearly straight leg while holding a weight (dumbbell or kettlebell)  in one hand, then lean forward (keeping torso square) while simultaneously lowering the hand with the weight to the floor in front of you and raising your other leg behind you.  Here's a good description.    It's key to keep the movement controlled and your core engaged, with hips level (no twisting or rotating). This forces your core and glutes to work together, and also makes your feet and lower legs work some to stabilize you.  I do these everyday with light weight or no weight at all as an "easy" exercise that challenges balance and coordination.  Increase the weight, and you have a more challenging exercise (see below).

Challenging  As noted above, these are the exercises that are beneficial, but also can tire me and fatigue the same muscles I use when running.  In order to ensure that these DON'T compromise my running workouts, I do these immediately after my hardest running workouts (intervals, tempo, long run).  That way, I have the best chance to recover from them before the next workout  Effective training isn't just about stress, but about the proper balance of stress and recovery; doing squats on an easy day is a good way to compromise your training. 

And of course, since the goal of these is injury prevention, I skip them if I feel that I tweaked something during a workout.  It'd be pretty stupid to get injured doing the very thing that's supposed to keep you healthy.
Ye olde power cage.
  • Barbell squats.  Pretty self explanatory.  Set up power cage, weight up the bar, and squat.  I do in sets of 8 -- if you must know the #s, I start at one set of 8 reps of 115 pounds, and then up the weight by 5-20 pounds for each successive set - usually ending anywhere between 145 and 155.  My goal in doing these is to place weighted stress on my spine to encourage bone density there (I have osteopenia in my spine that's close to osteoporosis levels, so this type of work is really important).  I only squat to barely parallel; since my goal is spine loading, I'd rather get more reps with a more limited range of motion.

  • Good mornings.  Another good one for placing load on the spine.  Video here.  I do for 2-3 sets of 10 reps, usually between 95-115 pounds. 
  • Single leg deadlifts.  Same as above, only I use a heavy weight - up to about 35 pounds if I'm up to it.  This is great for making your glutes medius and maximus coordinate with your core.  I hold the dumbbell in one hand only, which makes me work a little harder to keep balance, since the single weight pulls me to the side.  I'll do this both with the weight in the same hand as the leg I'm balancing on (right hand, right leg) and opposite hand and leg.

  • Quad presses with limited range of motion.  I have a slight tendency towards runners knee, with a very clear cause -- my vastus medialis ("VMO") muscle on the inside of my thigh tends to get weaker than my other quads, with the result that my knee cap gets pulled slightly out of alignment.  Very easy fix -- keep the VMO strong.  So I sit on a leg extension machine and isolate the VMO by working a very small range of motion - just from knee almost straight to knee straight.  If you increase the range of motion by bending the knee more, other muscles get engaged, so it's better to stick to a very narrow range of movement, and pulse the muscle within that range.

Friday, May 4, 2012

The go bag

Standard stuff
for overnight horse show.
In my horse showing days, one always had to cart a ton of stuff around to each competition.  Usually in a collection of trunks.  Some of it would be stuff that you knew you'd be using (bridle, helmet, feed, supplements, water buckets), some stuff that you might need (rain sheet for horse, different types of spurs, duct tape), some stuff that you hopefully wouldn't need (first aid kit and medications for horse and rider).

And it was force of habit to keep this packed and ready to go.  When you got home on Sunday night, one of the last things you'd do would be to clean everything and put it back (or replace used stuff), so that you were ready to go again.

Running is a lot simpler in so many ways, including the fact that there's a LOT LESS stuff to worry about.  But the idea of a "go bag" - a portable collection of stuff that you will or might need -- still applies.

Here's what's in the backpack that I take with me to races, to check at the starting line and (hopefully) be reunited with at the finish. Obviously, the contents do get modified some depending on weather conditions, length of race, etc.  And I have to pare stuff down when the race requires that I use their bag rather than mine.
  • Miscellaneous
    • A magazine to read if I'm waiting around
    • Marker and pad of paper - surprisingly convenient
    • Business card -- in case my bag gets misplaced, there's some hope that my bag will get back to me
    • Cell phone -- I used to have a nice pricy smart phone that I would never leave in my bag (rule: never leave anything in your bag that would be really bad to lose).  But now I have a crappy phone that I'm looking to replace.  So sure, I'll leave it in my bag.
  • Pre-race stuff
  • Seems silly to carry, until you need it. 
    Then everyone's your best friend
    • "Disposable clothing" to wear and then toss; I'll usually have both a long sleeve t-shirt and a sweatshirt, so I can pick the one most appropriate for the conditions.  I'll also have a pair of old crew socks to use as mittens until race start, if need be.  Also a large plastic trash bag, in case it rains.
    • Toilet paper - invaluable if the portapotties are out.
    • Pepto-Bismol - if you want this pre-race, you'll REALLY regret not having it
    • Bodyglide and vaseline - 'nuff said
    •  Extra safety pins - surprising how handy these are.
  • Race stuff
    • Sunglasses
    • Running hat with brim (in case of rain)
    • Disposable handwarmers -- I have a fairly bad case of Raynauds, so these are essential anytime race temps are below 60.  I use "Little Hotties."
    • Headband/earwarmers
    • You can get for a good price
      at Road Runner Sports
    • Gloves
    • Gels (I usually bring more than I'll need)
    • Asthma inhaler
    • Extra Garmin -- yes, I have an old Garmin I don't use any more, since I upgraded.  So I keep it in my bag, as a back-up.
    • Disposable hand-held water bottle (for longer races).  Run with it for the first 5 miles, then toss when empty.
  • Post-race stuff
    • Change of clothing - usually a top with my team's logo as well as a pair of sweatpants/tights.
    • Laundry bag for my race clothes.  I usually use one of the bags provided by the Rock N Roll races for bag check - they're the right size, and the fabric they're made of seems both to fight odor and to let clothes breath.
    • Really invaluable for post race chill.
    • Shoes and socks - don't underestimate the luxury of swapping into dry socks and shoes.
    • Clean-up and first aid:  My "kit" includes
      • Anti-bacterial wipes, bandaids, and Neosporin for blisters
      • Naproxen, arnica gel, KT Tape, plus spare Patt Strap and heel lift, in case I develop any injuries
      • Cold pack in case I strain something (also keeps my eggs cold).
    • Post-race nutrition.  My stomach's pretty iffy, so I usually can't rely on the race to provide stuff I can eat.  And, I'm a huge believer in having your post workout nutrition within that 20 minute window -- if you wait to eat at home an hour later, you've missed a valuable opportunity. So I bring my own.
      • Bottle of coconut water
      • Recovery drink (for me, 32 oz of water combined with one scoop of Ultima and one scoop of Heed)
      • Two hard boiled eggs, kept in a insulated bag that also holds a cold pack -- both to keep the eggs cold and in case I need to ice something.
      • Salt shaker -- I'm a VERY salty sweater, so this ain't optional.
      • Shot Bloks and Sport Beans.  I like Margarita Shot Bloks and Fruit Punch Sport Beans.
I will note that there are a few things that I always keep on my person when I race. They are my house keys/car keys and about $20 in cash.  The idea is that if my bag does disappear, I'm still able to get home.

Wednesday, April 25, 2012

Attacking Allergies

It's springtime in DC, and many of us are suffering.  Even people who don't suffer allergies in other locations come to DC, and start noting congestion, watery eyes, etc.

And for those of us who are allergy sufferers, DC is bad.  Bad enough that we supposedly have "our own kicked-up definitions of 'very high'."

In years past, the pollen ruined my running each fall and spring.  My lungs would feel like a forest of mold was growing within them -- "clogged" was the term I used -- and it was a struggle for me to run even at easy pace some days.  I'd take an OTC anti-histamine, with only mild improvement.

However, I've spent a lot of time researching, consulting allergists, and experimenting, and have found a program that seems to work for me.  No, it's not perfect.  I'm still impaired, and definitely have tough days when the pollen is high.  My eyes still water, I still sneeze, I still feel tired, my breathing still hurts.  That hasn't changed.  But I AM able to run, and to do workouts, and even to race.  Heck, even though I don't feel 100%, I'm setting PRs (which also makes me feel really good about my running).    I'm running at 90%, rather than 50%.  And that's pretty darn good.

Here's my program.  Yes, it's a lot.  But it works.

  • Showering:  Yes, it's a good idea in general.  But even better after you've been dowsed in pollen.  I shower after every time I venture outside, and I wash my hair each time.  A lot of pollen can collect on one's hair and skin.  Removal is essential, and the less time the pollen has to affect you, the less irritated your system gets.

    Unresolved childhood trauma in a bottle. 
    On sale at CVS.  Next to the anxiety meds.
  • Neti pot: I use this after every time I go outside -- same theory as the shower.  And the salt water up the nose brings back memories of childhood trips to the beach, where I'd play in the ocean and get knocked over by a wave and trapped by the weight of the water so that I couldn't get up and I was drowning and the lifeguard couldn't see to help me....  

    Moving on.
  • Pillow cases: these get washed every other night, and I always use fresh ones the night before a workout or race.  Pollen (and cat dander) accumulates on these; best not to let your head steep in allergens for 6-8 hours a day.

  • Air filtration:  I have a  Holmes Air Purifier.  It seems to work well enough; I definitely wake up with less irritation when it's on.   Added bonus feature is that it's a white noise generator -- helpful when you live in an urban neighborhood, with your bedroom window at street level.
  • Allegra:  I've tried them all -- Benadryl, Claritin, Zyrtek, and Allegra -- and I'd list them in that order in terms of effectiveness, from least to most.  Allegra's really been the best of the OTC, and helps me some, though it's not a complete solution.  No, I don't do the "D" versions -- taking anything with pseudoephedrine is pretty much a guarantee of screwed up sleep for days.

  • Quercetin:  Fantastic stuff.  It's a natural anti-histamine (same stuff that's in apple skins, grape skins, etc).  There's no studies yet definitively establishing its benefits for human allergy sufferers, but I can vouch that in my case, it's been a game changer.  I can't rule out the placebo effect, of course, but I really started it last fall with a lot of skepticism after it was recommended to me.  I took it, forgot that I had taken it, and then noted to a friend that the pollen really wasn't that bad.  In the wake of my friend's stunned response, I remembered that I had tried the quercetin. 

    You can find this at Whole Foods. 
    Friends don't let friends use this.
    Or at least sit near them.
    I'll be the first to admit that the Whole Foods supplement aisle is a SCARY SCARY place, inhabited by believers in bach flowers and homeopathy and deodorant crystals
    and "Tom's Toothpaste."  But not all supplements are bad (see...calcium).  And, having run my use of quercetin past my allergist, my primary care doctor, and my father (a doctor with expertise in medication side effects), I'm pretty comfortable using it. 
    I use the Whole Foods store brand, with 500 mg quercetin, 350 GDU bromelain, and nothing else.
  • Singulair: Prescription medication for asthma/allergies.  I'm not sure how much use it is.  Seems to help some, but could be my imagination.  I've inadvertently skipped a dose from time to time, and not noted much difference.
  • Pro-Air inhaler:  Prescription asthma inhaler.  No, this isn't specifically for allergies, but my allergies aggravate my exercise induced asthma, and so I lump this into the list.  You need a prescription for this, and if you don't have asthma/bronchoconstriction, it won't make a difference.  Keep in mind that these also aggravate acid reflux, and also can have a stimulating effect similar to a cup of coffee.
  • A sense of humor, and self-tolerance:  Free, and surprisingly beneficial.  You can only control your allergies so much, but you can control your attitude.  Focus on maintaining the effort level that will allow you to complete your workouts successfully, and you'll be pleasantly surprised by how successful your spring is.  And on the toughest days, just rationalize that you're getting the benefits of altitude training from the comfort of your own city.